

Knowbe4 is a wildly used security awareness platform, and while some security professionals (including me) might have reservations about the effectiveness of the platform, there is no denying it's considerable market share and hence the importance of having robust identity and access management functions in place.
The platform integrates nicely with Okta but, unfortunately, that doesn't apply to SailPoint as there is no connector for Knowbe4 and administrators of SailPoint products must resort to using the Web Service connector to get data from Knowbe4 into the governance platform. This post is a detailed guide on how to successfully integrate the two systems.
Requirements
- You need to be comfortable around REST APIs.
- You need to be an administrator on both SailPoint and Knowbe4.
- I strongly recommend using sandbox environments before deploying your integration into production.
Configure Knowbe4
Let's start by configuring Knowbe4 to enable the required API and get the authentication token.
- Navigate to https://{eu|us}.knowbe4.com/ui/account/info#api-settings (make sure to use the subdomain the matches your instance location)
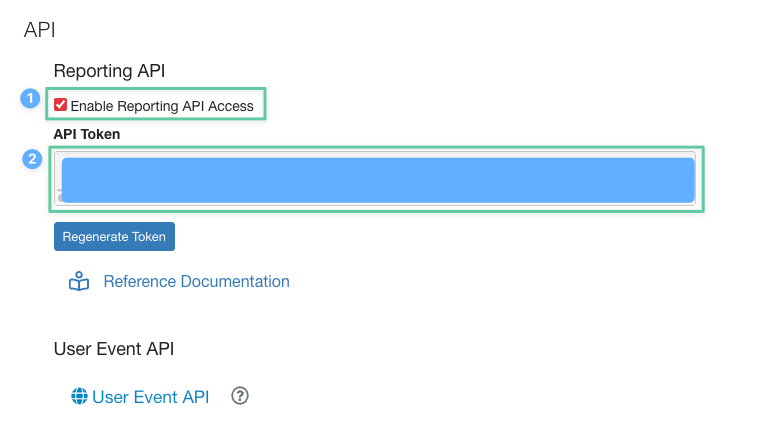
- Under the Reporting API section, check the Enable Reporting API Access checkbox.
- Copy the API token from the field below the checkbox.
- Make sure to save your changes by clicking the Save Changes button.
Test The API
Before we proceed with the integration, take a moment and use your favourite API management tool to test that the API and your token are working fine. If you request https://{eu|us}.api.knowbe4.com/v1/users, you should get a list of all the users in your Knowbe4 account. If you see something similar to the code snippet below, then everything is working great.
[
    {
        "id": xxx,
        "employee_number": xxx,
        "first_name": "xxx",
        "last_name": "xxx",
        "job_title": xxx,
        "email": "xxx",
        "phish_prone_percentage": xxx,
        "phone_number": xxx,
        "extension": xxx,
        "mobile_phone_number": xxx,
        "location": xxx,
        "division": xxx,
        "manager_name": xxx,
        "manager_email": xxx,
        "provisioning_managed": xxx,
        "provisioning_guid": xxx,
        "groups": [
            xxx,
            xxx,
            xxx
        ],
        "current_risk_score": xxx,
        "aliases": [
            "xxx"
        ],
        "joined_on": "xxx",
        "last_sign_in": "xxx",
        "status": "xxx",
        "organization": xxx,
        "department": "xxx",
        "language": xxx,
        "comment": xxx,
		.
        .
        .
    },
    {
        .
        .
        .
    }
]Create A Web Service Connector
Now that we have a working API and functioning token, let's move on to SailPoint. The first thing we need to do is create a Web Service connector as following:
- Log in into your SailPoint system and switch to the Admin view.
- From the Connections menu, select Sources.
- Click on the New button to add a new connector.
- Fill in the information as illustrated in the following screenshot and Continue:
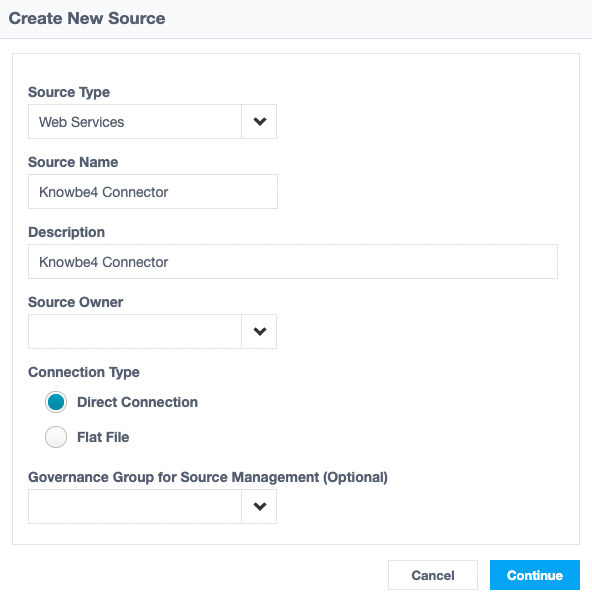
Important: While not included in the screenshot above, you must select the source owner for this connector.
- Once you press Continue, the source configuration page opens, and there are many things to configure here.
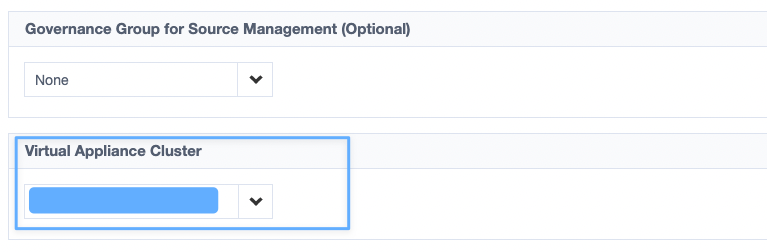
- First, you need to select the VA's Cluster that will be used for this source (see picture). Remember to click Save after selecting the cluster.
- In the Authentication Settings, set the Authentication Type to API Token and add the token you got from Knowbe4 in the field named API Token located further down the same page. Save your changes.
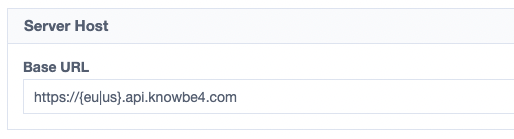
- In the Server Host section, add the API domain we got from Knowbe4 in a previous step in the Base URL field and save your changes. Remember to choose the correct subdomain.
Create A Schema
Before we continue with technical configurations, we need to create a technical Schema for our accounts. This schema will be used by SailPoint to map the values we get from Knowbe4 into fields that can be used within SailPoint itself (think correlation, search, etc.).
- Switch to the Import Data tab on the same page. Navigate to the Account Schema Section
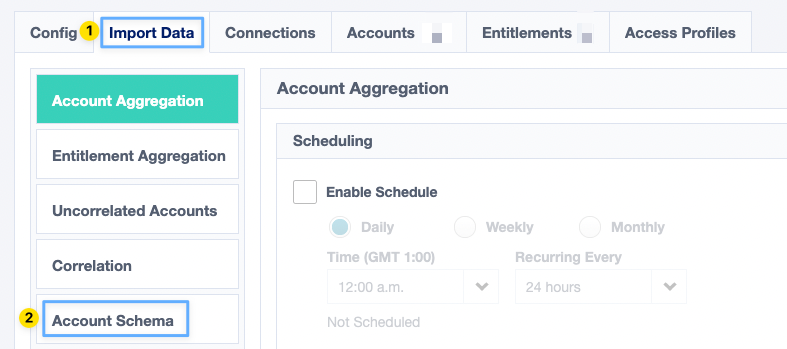
- You start with an empty schema. Click on Add New Attribute to add your first schema attribute. Once you click save you will get a warning about Account Name and ID, you can proceed, and we can modify these values later on.
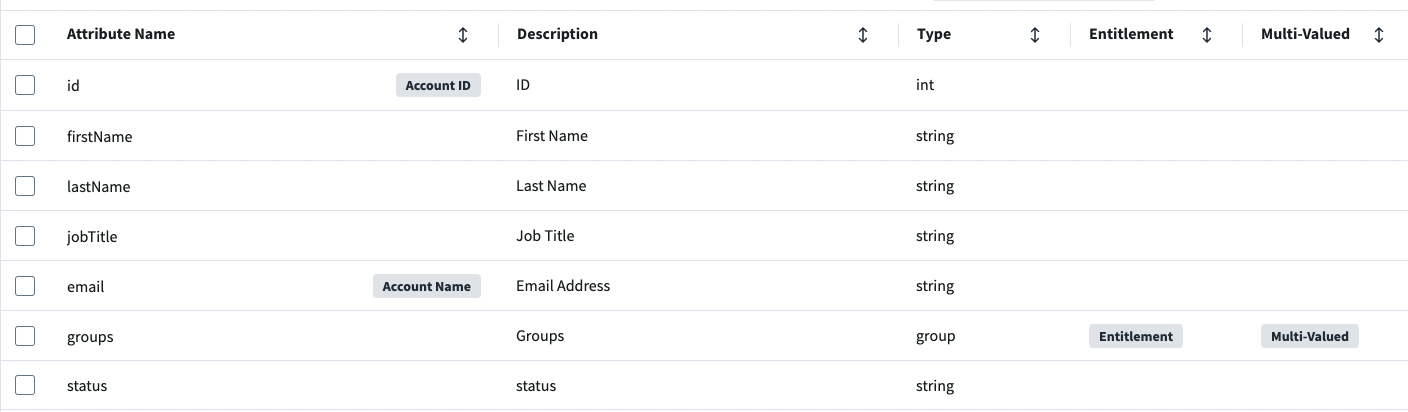
- You need to add the following attributes to your schema, at a minimum (add a useful description to each attribute):
id (int, Account Name & ID), firstName (string), lastName (string), jobTitle (string), email (string), status (string), and groups (Entitlement, Multi-Valued).
Now that our schema is ready, we can go back to our source configuration page. Switch back to the Config tab.
Account Aggregation
We already know the API and our token are working, so we can skip the test operation part and jump directly into fetching users.
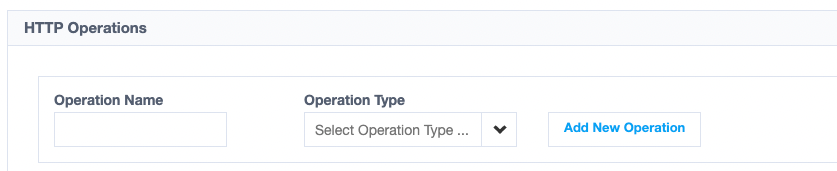
- In the HTTP Operations section (all the way down the page), add a name for the operation in the Operation Name field, select Account Aggregation from the Operation Type list and click Add New Operation (see picture below)
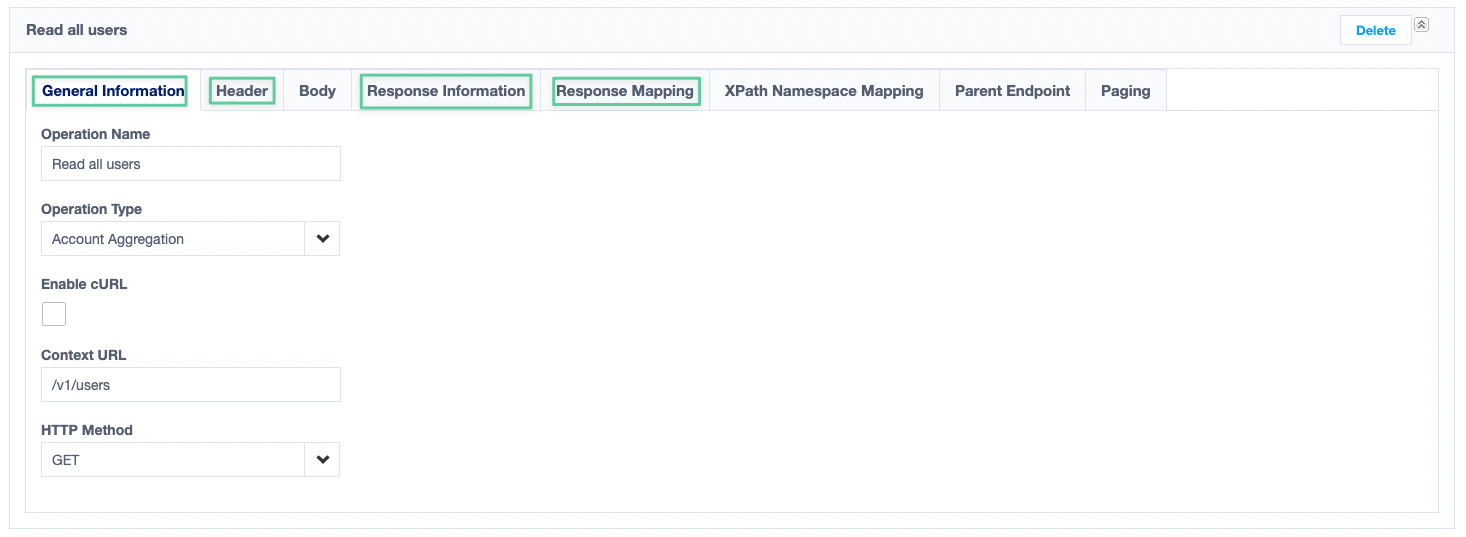
- There are eight configuration sections for each HTTP operation, but we will only work with four of them (General Information, Header, Response Mapping and Response Information).
- Configure the first section (General Information) similar to the configuration in the screenshot below (namely, adding the Context URL):
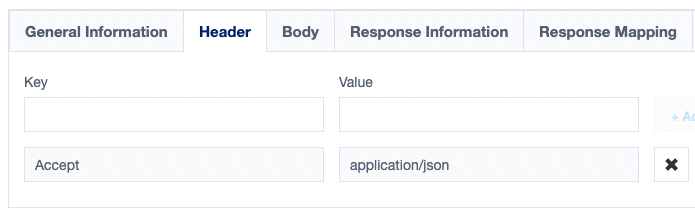
- In the Header section, we need to add one header and that's the Accept header to set which data format our connector will be dealing with.
- In the Response Information section, set the Response Code to 200. Make sure to save your changes after each step.
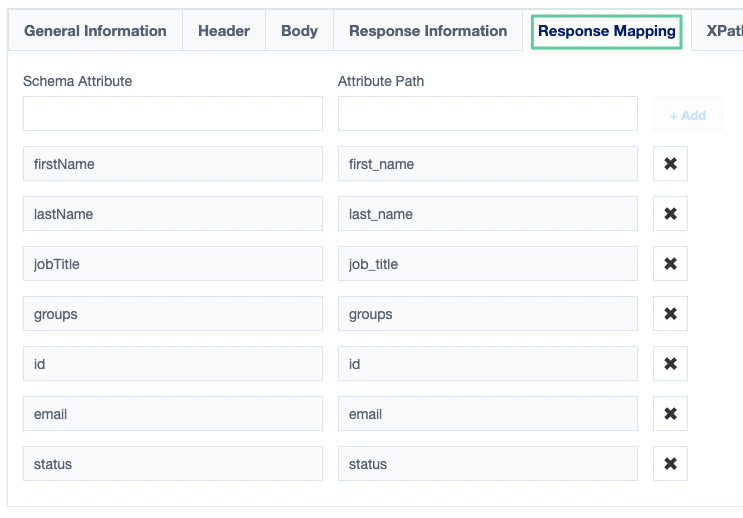
- The last and most important section is the Response Mapping section, where we will map our schema attributes to the fields we are getting back from Knowbe4.
Save your changes and you will be set to test the first part of the integration, account aggregation.
- Switch to the Import Data tab and make sure you are in the Account Aggregation section. Click on the Start button next to the Manual Aggregation label. This will kick off a manual aggregation and if all goes well, you should see a Success status and get some numbers in the Accounts and Entitlement tabs.
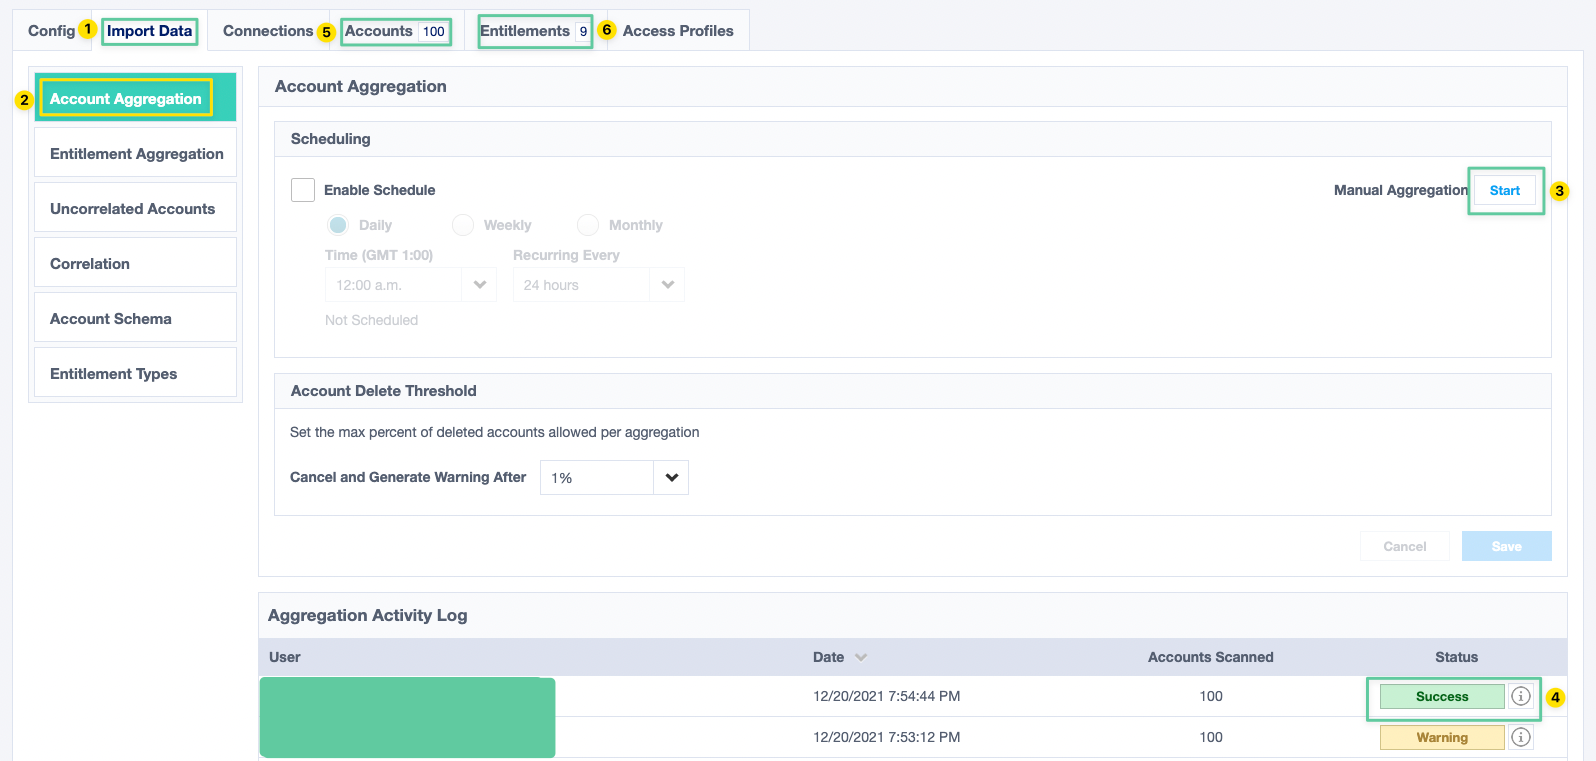
Critical Note: If your users in Knowbe4 have the same email addresses as their identities in IdentityNow or IdentityHQ, they will be automatically correlated. If you have uncorrelated accounts, it might mean there is some mismatch in the data.
Entitlement Aggregation
If you have followed the steps in the previous section, you will notice our entitlements include only the ID of the groups, which aren't very useful for certifications or search operations. To improve this, we will add a new HTTP Operation to fetch the entitlements directly from Knowbe4, but before we can do that, we need to update the schema for our entitlement type first.
- Go to the Import Data tab and navigate to the Entitlement Type section.
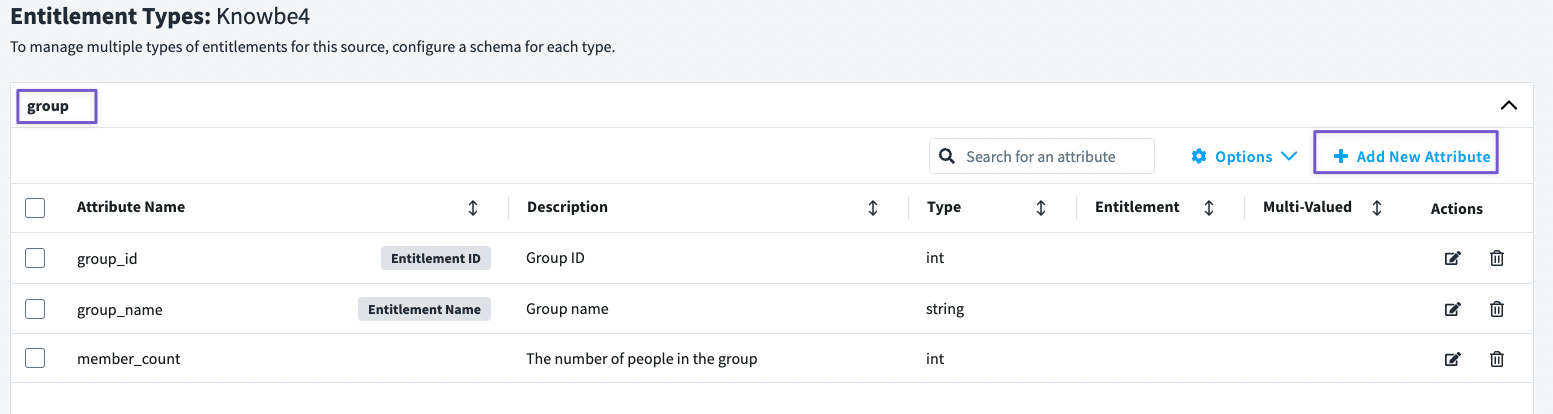
- The Entitlement Types window will have one type (group) and the schema for that one will be empty the first time you view it.
- Add the following three fields (see picture below) by clicking on the Add New Attribute button in the top-right corner.
- Once done, click on Options and choose Edit Types. This will allow you to update the Entitlement ID and Entitlement Name, make sure they correspond to the configuration in the following screenshot.
Now that we have updated our entitlement type schema, let's add a separate HTTP Operation for Entitlement Aggregation.
- Like the previous HTTP Operation, give the operation a name and select Entitlement Aggregation as Operation Type then click add.
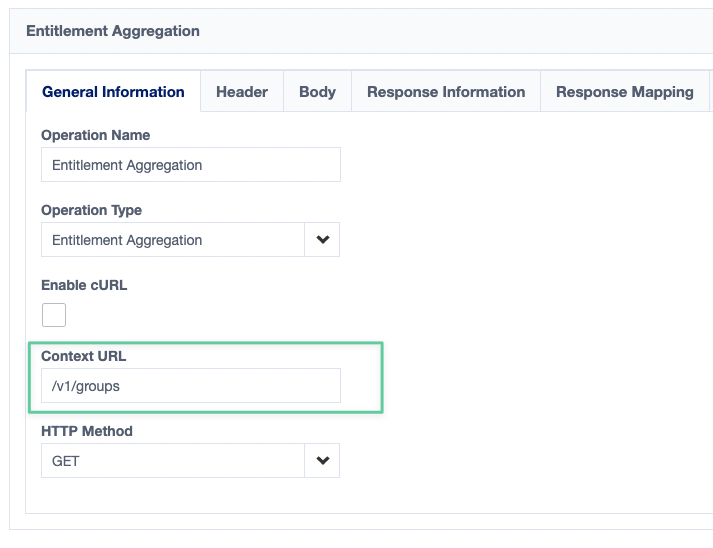
- Once the new operation is added, configure the General Information section by adding /v1/groups in the Context URL field and make sure the HTTP Method is GET. Don't forget to save your changes.
- In the Header section, make sure you have the Accept header (yes, same one as the previous HTTP operation).
- In the Response Information, make sure the Success Code is 200 or 2**.
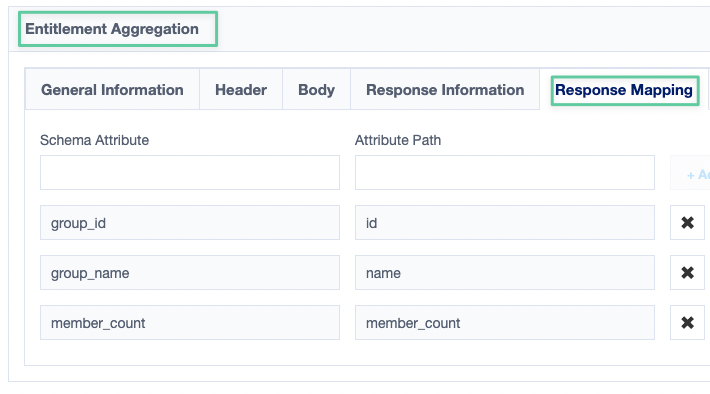
- In the Response Mapping section, we need to map fields we are getting back from Knowbe4 to the attributes we created earlier in our Entitlement Type.
Once you have completed all of those steps, we are now ready to run a manual aggregation for entitlements.
- Go to the Import Data tab and navigate to the Entitlement Aggregation section.
- Start a manual aggregation by clicking on the Start button next to Manual Aggregation.
- Once successful, you should see your entitlements in the Entitlements tab and if you check them, you would see they now have proper names instead of their IDs.

Summary
So, here is what we have achieved today:
- Enable the reporting API on Knowbe4, create an access token, and test everything is working okay. ✅
- Create a web service connector and configure the basic details. ✅
- Create the account schema for our source. ✅
- Configure Account Aggregation. ✅
- Configure Entitlement Aggregation. ✅
- Test everything works as expected. ✅
This has been a long post, so kudos is you made it to this point. I hope you learned something new and more importantly, enjoyed reading this rather long post.
Links
- SailPoint's Web Services Source Configuration Reference Guide
- https://developer.knowbe4.com/rest/reporting
- https://documentation.sailpoint.com/saas/help/access/entitlements.html