
SailPoint recently published a Slack app that allows users to interact with SailPoint from the comfort of their Slack message box and without having to log in through the web interface. If you ask me, this is a pretty cool app that has the potential of improving end users productivity and user experience. In this short blog post, let's go through how you can set up your SailPoint Slack App and connect it to your SailPoint tenant, so your users can make use of it.
Available Features
As per the official article, users can perform the following operations using the Slack app:
- Make role or application requests right within Slack using the shortcuts button
- Cancel an access request if they don't need it
- Approve or deny new access requests and add comments if needed
- Get notified when an access request is approved or denied along with comments
Setup
- Make sure you are logged in to your Slack workspace and have enough permissions to install new apps.
- Navigate to: https://community.sailpoint.com/t5/SaaS-Integrations/SailPoint-For-Slack/ta-p/184002
- Click on the big button titled Add To Slack

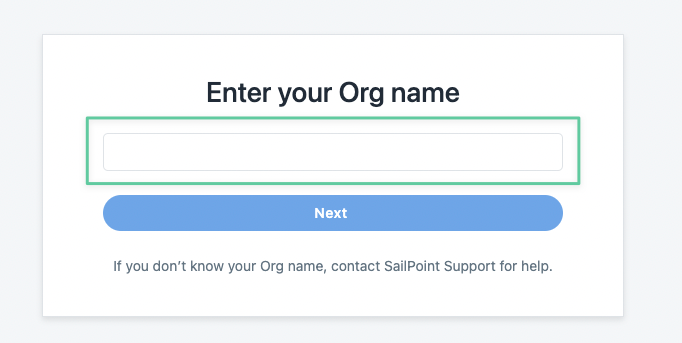
- A new window will open and ask you to enter your organization name. This is your SailPoint organization name and not your Slack workspace.
- Once you hit next on the previous window, you will be redirected to your SailPoint tenant and required to log in if you haven't done that before starting this process.
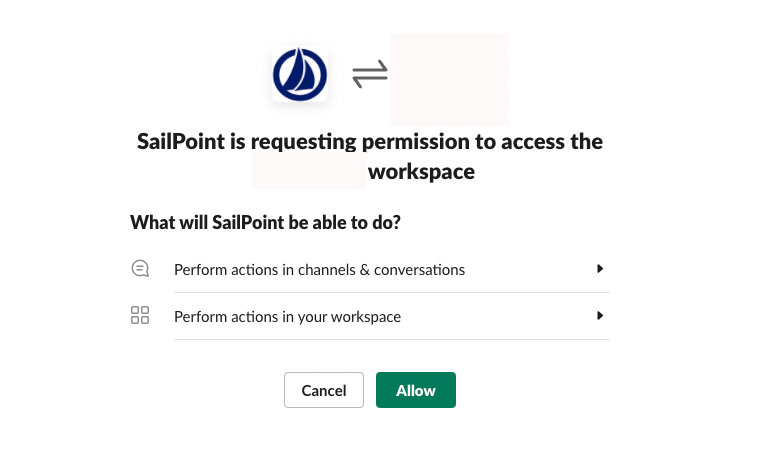
- After you log in to your SailPoint account, you will be redirected to Slack and presented with the following authorization screen (make sure to select the correct workspace from the list located in the top-right corner).
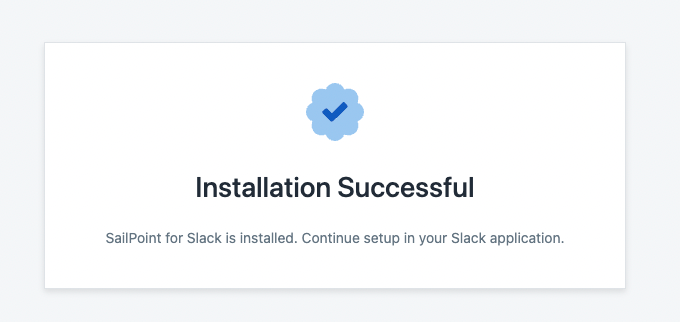
- After you authorize the application, you will get a confirmation page that the installation has been completed.
- To configure the application, go to any public channel on your work space and issue the following slash command:
/sailpoint loginYou will get the following message, click on Connect:

- If you are still logged in your SailPoint account, you will see a couple of redirects between Slack and SailPoint before you are finally redirected to Slack, where you will see the following message:

Create A Request
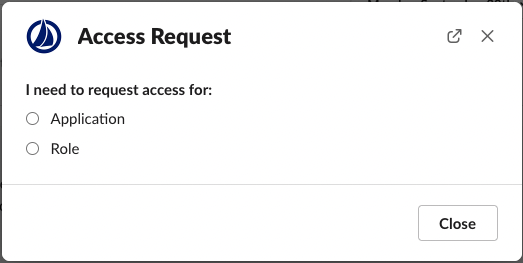
You can request access to an application or a role from any channel where the SailPoint has been added to, including private channels. Just use the shortcuts menu or issue the following slash command sailpoint create and you will be presented with the following screen:
I selected Application, which showed me an updated view with more fields to fill in:
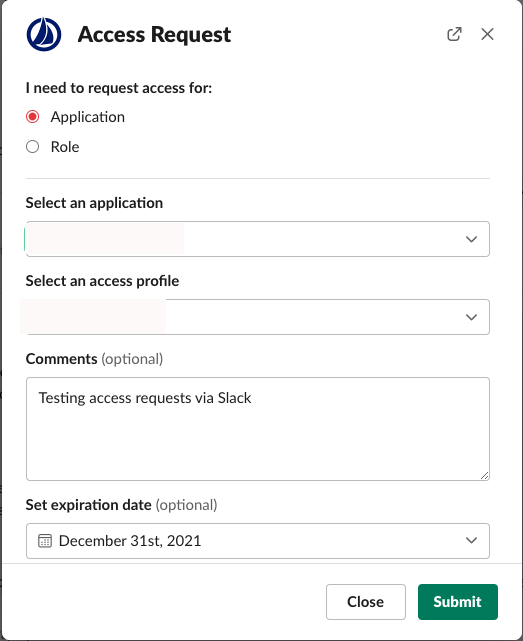
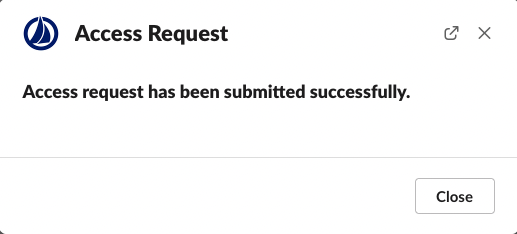
Once I hit Submit, I get a confirmation that my access request have been submitted successfully.