

In a previous blog post, I outlined how you can add simple Google authentication to any web application using OAuth Proxy. It's a pretty simple process that adds an extra layer on top of applications that don't support SSO or other authentication options. I recently realized it's about time I wrote another post on how to do the same thing but instead of Google, using Okta, and here we are.

You can follow most of my previous guide to set up things, so I will not repeat information in this post, but rather focus on the parts you need to change to make things work with Okta.
A Quick Checklist
- Install Nginx.
- Point your domain or subdomain to the public IP of your Nginx instance.
- Install OAuth Proxy and create a configuration file.
- Create a new App Integration on Okta and configure it for OIDC.
- Fill in the configuration file with the correct values.
- Reload everything and test.
- Success!!!
Create An Application On Okta
Creating an application in Okta is a simple process, here is the quick rundown of how it works:
- Login to Okta.
- Switch to the Admin interfaces by clicking on the Admin button and inputting MFA if asked.
- Go to Applciations and click on Create App Integration.
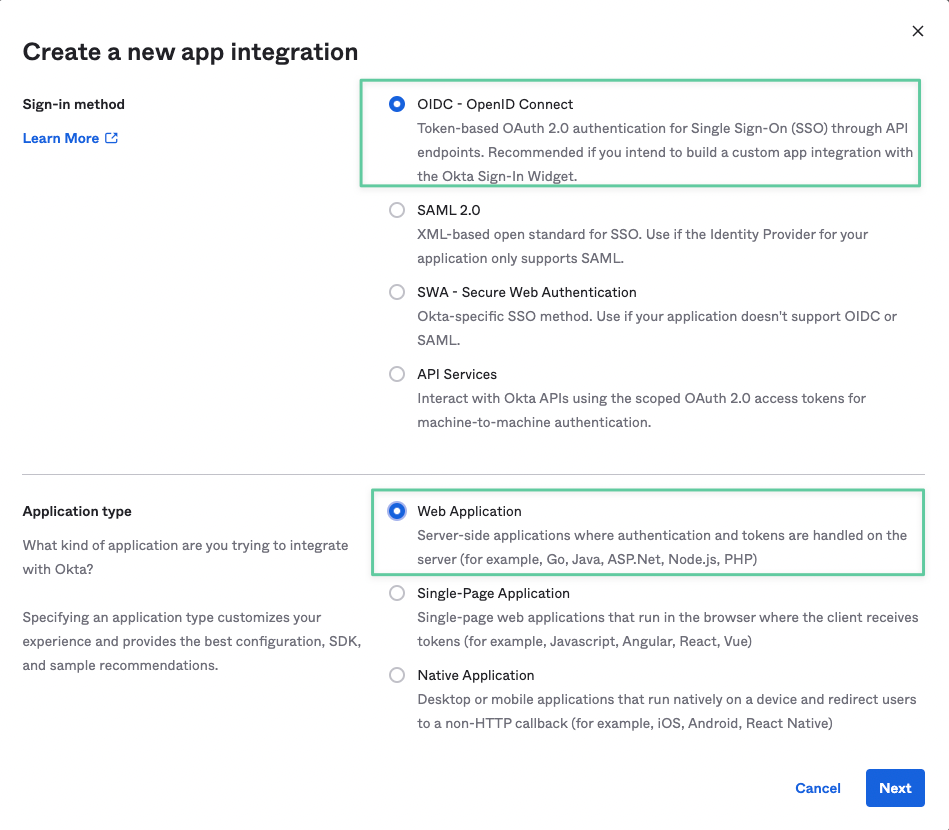
- In the first windows, select OpenID Connect as the Signin Method, and Web Application as the Application Type.
- In the New Web App Integration windows, you can set a name for your application, and maybe add an icon.
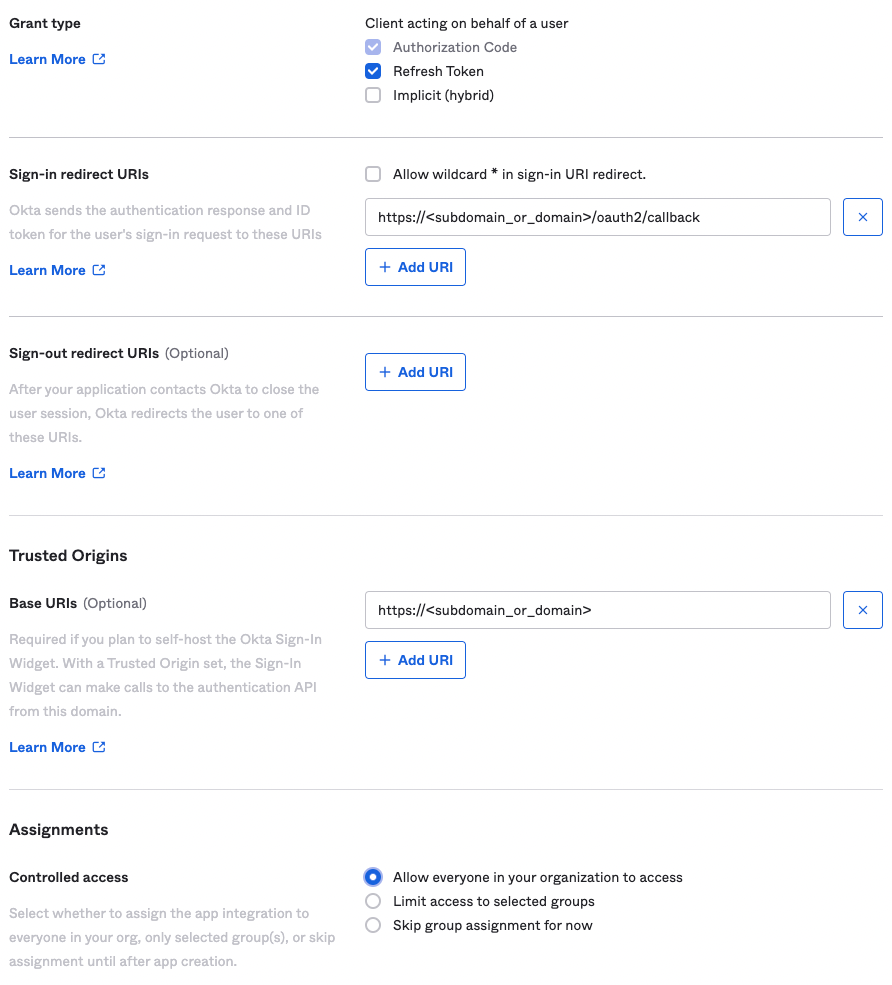
- On the same window, in the Grant Type section, leave Authorization Code checked and check the box next to Refresh Token.

- In the Sign-in redirect URIs section, add the following after replacing the dummy subdomain with the domain or subdomain pointing to your Nginx server. https://<subdomain_or_domain>/oauth2/callback
- Remove any defualt URLs in the Sign-out redirect URIs section.
- Optionally, you can add the base URL of your website in the Trusted Origins section, I recommend adding it.
- Finally, in the Assignments section, select whatever option you want. This basically controls who will get this app on Okta so the setting depends on your own rules or policy.
- Once you save your app, it will redirect you to the app configuration page where you will immedately be presented with the Client ID and Secret values, copy those, we will need them in a moment.
- The final setting you need to change is called Initiate login URI, simply scroll all the down on the application General tab and you will find it. Edit the General Settings section on the page, and paste the base URL of your site in the Initiate login URI field.
You are now ready to move to the next step. To proceed, you need to complete step 3 from the quick checklist section of this post. Once that's done, proceed to the next step.
Update Your OAuth-Proxy Configuration
You need to replace your existing – if you have one, otherwise create it – OAuth-Proxy configuration with the following one:
provider = "oidc"
redirect_url = "https://<YOUR-WEBSITE-URL>/oauth2/callback"
oidc_issuer_url = "https://<YOUR-OKTA-SUBDOMAIN>"
upstreams = [
    "http://127.0.0.1:8080/"]

email_domains = [
    "xyx.com"
]
client_id = "....."
client_secret = "..."
pass_access_token = true
cookie_secret = "<RANDOM-LONG-VALUE>"
skip_provider_button = true- You have to specify a domain in the email_domains configuration to limit who is allowed to use Okta to authenticate against your site. DO NOT LEAVE THIS EMPTY. DO NOT USE A WILDCARD.
- Paste the Client ID and Secret in their respective configuration fields.
- The skip_provider_button removes the need of clicking on a button before the user is redirected to Okta which makes the experince a bit more seamless.
That's it. You have successfully added a layer of authentication to your website, wiht minimal effort and simple configuration.
Links
- https://www.okta.com/
- https://github.com/vouch/vouch-proxy
- https://www.digitalocean.com/community/tutorials/how-to-secure-nginx-with-let-s-encrypt-on-ubuntu-20-04
- https://www.digitalocean.com/community/tutorials/how-to-install-nginx-on-ubuntu-20-04
- https://developer.okta.com/blog/2018/08/28/nginx-auth-request