In a previous post, I described how to configure a custom domain for your Okta tenant and get a TLS certificate for that domain, so your end users can use a familiar and easy to remember URL when accessing Okta. It's a great setup that every Okta administrator should implement for their users' sake.

However, the manual renewal process for Let's Encrypt certificates was rather daunting, so you can imagine my happiness when I learned Okta has released a beta feature that finally offers Let's Encrypt certificates that are managed by Okta. In this post, I walk you through what you need to do to make use of this new feature.
Important Disclaimer: This feature is in beta stage, it might have some bugs or unsuspected behaviours, so keep that in mind when enabling it in your environment.
Requirements
- You need to be a super administrator on your Okta tenant.
- You need to have your DNS management service of choice (e.g. AWS Route53, Namecheap, ...) open, so you can make some required DNS changes.
- You should perform this outside working hours and still inform your users about the possible downtime just in case someone is working late.
Enable The Feature
To enable this new feature, you need to do the following:
- Login into your Okta account.
- Switch to the administrator view.
- Navigate to Settings ⇾ Features
- Enable the feature named: Custom Domains with Okta-Managed Certificates

Remove Your Custom Domain
Unfortunately, we can't switch to the managed certificates without removing and readding the custom domain one again. To accomplish this, simply:
- Navigate to Customizations ⇾ Domain
- Click Edit and then Remove Domain buttons. Confirm the dialogue to proceed with the deletion.
- Domain removed, success!

Reconfigure Your Custom Domain
Now that our custom domain and certificate is gone, we need to reconfigure it.
- On the same page (Customizations ⇾ Domain), click Get Started
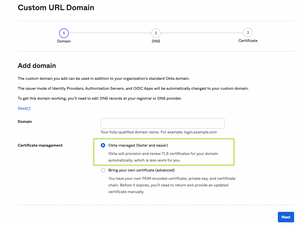
- In the first configuration window, enter the custom domain and select Okta-managed (faster and easier) in the Certificate management section.

- The next window will provide the updated DNS record values that you need to replace the old values with (in case you configured a custom domain before) or create new DNS records. Give it few minutes to proper gate before clicking Next.
- Once Okta verifies the DNS records, the system will request a certificate from Let's Encrypt and deploy it onto your tenant.

- It takes a few minutes for DNS records to propagate and everything to settle in place, but once that happens, you should see the following in your domain confirmation page:

That's It 🎉🎉🎉
You have successfully configured Okta-managed certificates on your Okta tenant, your users and security engineers will thank you for this simple change. 🎉🎉🎉


