

The way pinned messages work in Slack is one of the things I find frustrating about the platform. If I pin a message, I expect it to remain visible in the channel not tucked into a side tab. This post outlines a rough PoC for a Slack application that can help you "truly" pin your messages.
Disclaimer: The code in this post is a rough PoC, I just wanted to replicate the basic concept. I will implement fixes and improvements before putting it on GitHub.
Back in October, Riot Games published this post explaining how they integrate Slack in their development lifecycle. It's an interesting read and worth the time, so if you have a few minutes, go and read it.
One thing that caught my attention was their PinnedButtons custom application. Ever since I saw their post, I kept an item on my planning calendar to sit down and try to build this Pinned Buttons app. Well, it's the weekend, I have a few hours to kill, and I am in the mood for some coding to let's do this.
What is Pinned Buttons?
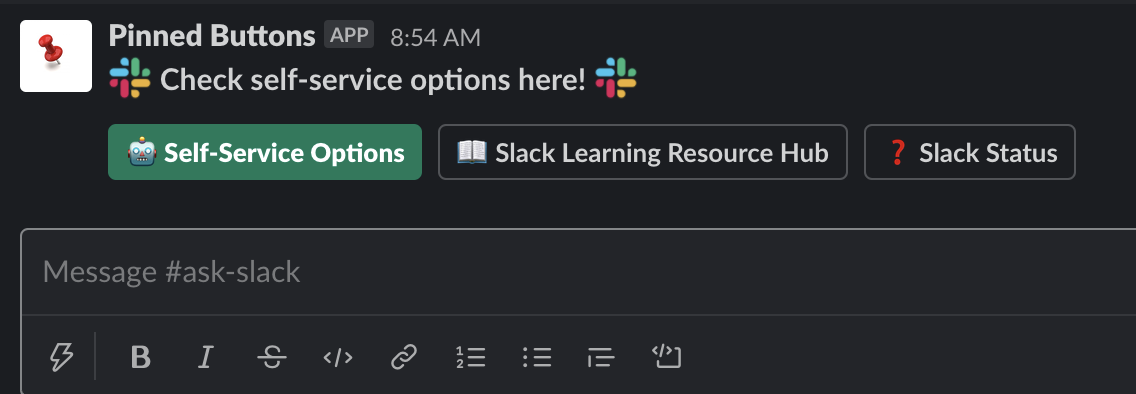
Pinned Buttons is a custom Slack app we built to help Rioters surface information and request help from other teams. Pinned Buttons attach themselves just above the message bar, giving Rioters contextual links and references before they send a message.
Pinned Buttons works by ensuring it’s always the latest message in the channel. The app listens to each channel in which it’s installed, and guarantees it’s always the bottom-most message by instantly posting itself again every time someone sends a new message (cleaning up its previous message each time). (Source)
I have been doing some development of Slack applications in the past months, and I found this Pinned Buttons concept intriguing, so I wanted to try and build it on my own. This application is by no means production-ready so use it as your own risk.
Requirements
There are a few requirements for this project; those are:
- A Slack workspace.
- A VPS
- A Domain
- Access to your domain DNS management interface
- Knowledge in Python development.
Setting Up A Server
I could go into details about setting up a small VPS, installing packages, and configuring DNS but I have faith in your abilities, and I think you can figure out how to do these things with the help of Google. Here is a checklist of what you need:
- Spin up an Ubuntu VPS (Guide).
- Install Nginx (Guide).
- Configure DNS to point to your VPS (Guide).
- Configure Nginx to serve content on your sub/domain (Guide).
- Install Certbot and configure a certificate for your sub/domain (Guide).
- Make sure you can browse your default website over a secure connection.
I spun a VPS on Hetzner, did the steps and now I have a functioning web server running and reachable on https://dev.ahmedmusaaad.com (will most likely be dead by the time I publish this post).
Fix Requests Routing
Since the Python code will be running locally, we must configure Nginx to route requests correctly.
Open your Nginx configuration
sudo nano /etc/nginx/sites-available/dev.ahmedmusaad.comAdding the following block underneath your default location block
location /slack {
	proxy_pass http://localhost:3000;
}
Creating A Slack App
There are many options and configurations available when you create a Slack app, and it can be confusing if this is your first time working with Slack apps. I will quickly go through the process and highlight the basic settings we need to configure for our PinnedButtons app.
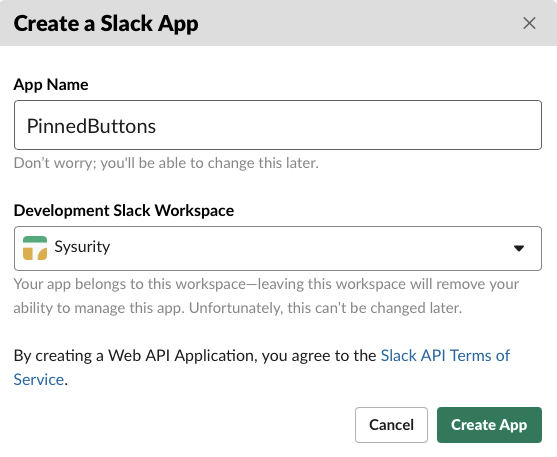
- Login into your Slack workspace on your browser of choice.
- Navigate to https://api.slack.com/apps?new_app=1
- This will open the following popup window, fill in your app name and select your Slack workspace from the dropdown list:
- The app is now created. We need to do some coding and configuration on our server.
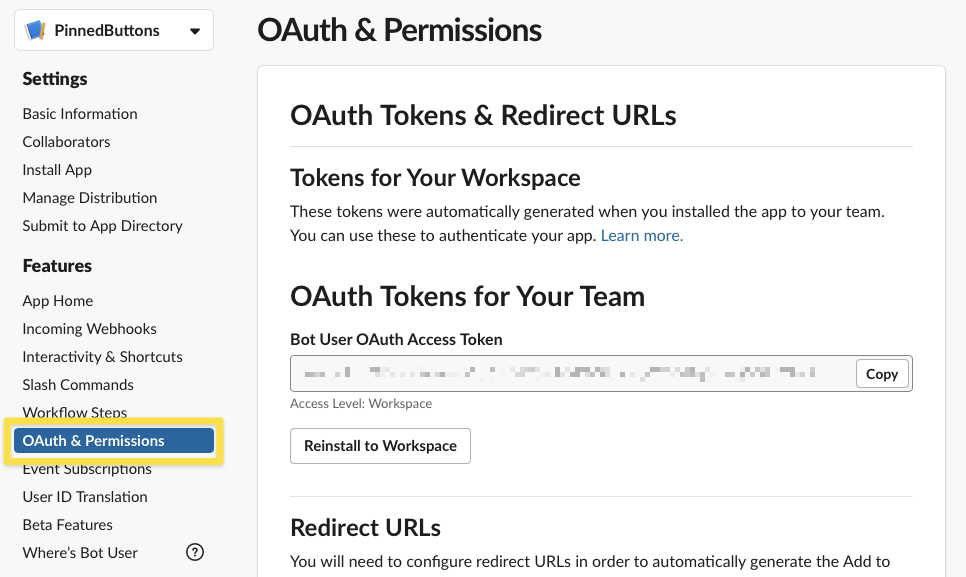
Configure Access Scopes
In your Slack App configuration page, navigate to the OAuth & Permissions section:
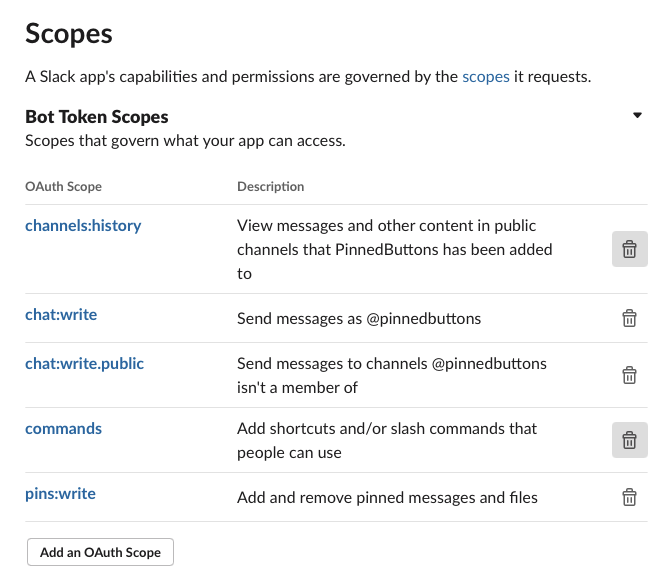
Scroll to the Scopes section and in the Bot Token Scopes, add the following scopes:
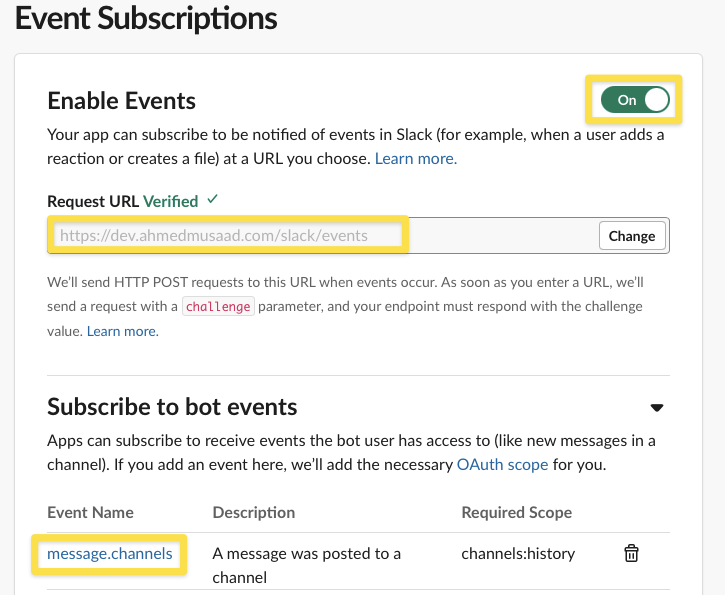
Configure Events Subscription
On the same app configuration page, go to the Event Subscription section and do the following:
- Enable events
- Put your web server URL in the request URL and make sure /slack/events to the end of the URL.
- Click on Subscribe to bot events and subscribe to the message.channels event.
Configure Slash Command
Last bit of configuration is the Slash command. Go to the Slash commands section and create a new command.
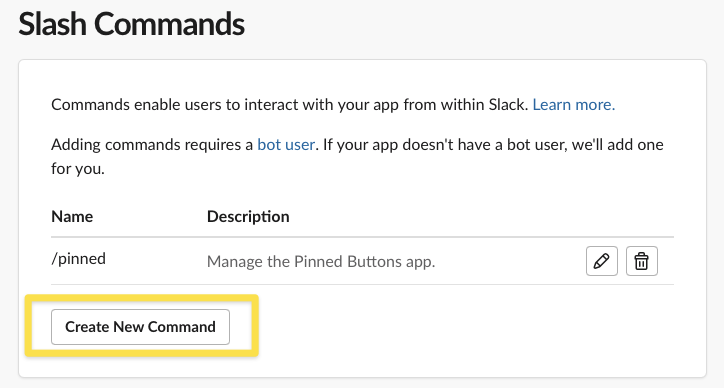
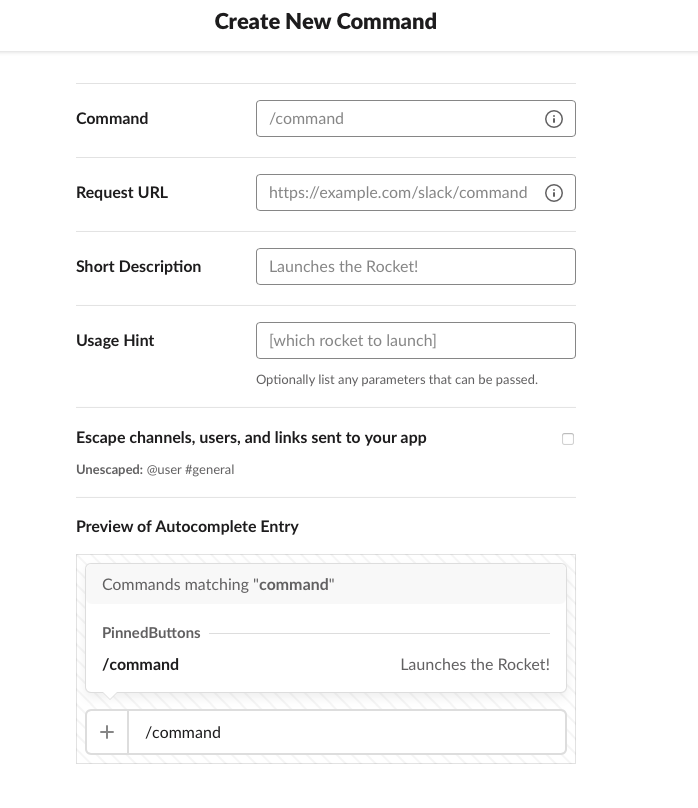
Fill in the following:
- Command: The word you want to use for your command (e.g. pinned).
- Request URL: The same URL as the one we used in the Event Subscription
- Description: A short description of the command.
- Hint: A hint for your users.
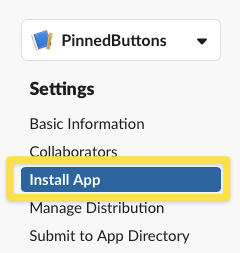
Install The App
We are now ready to install the app in your workspace and add it to one or two channels. Go to the Install App section and install your app. Authorise the bot user when promoted. Once done, go to your Slack workspace, and add the app to one of your channels.
The Code
Bolt for Python
Slack provides many different libraries and frameworks to help people develop applications that interact with the platform. I will use bolt-python since I am more comfortable working with Python.
A Python framework to build Slack apps in a flash with the latest platform features. Read the getting started guide and look at our code examples to learn how to build apps using Bolt. (Source)
Requirements.txt
typing
slack_bolt
slack_sdk
App.py
import logging
import re
from typing import Callable
from slack_bolt import App, Say, BoltContext
from slack_sdk import WebClient
import json

# Configure logging
logging.basicConfig(level=logging.DEBUG)
app = App()


# read files
def readfile(filename):
    return open(filename, "r").read()


# update the ts.txt file
def updatets(filename, newvalue):
    f = open(filename, "w")
    f.truncate(0)
    f.write(newvalue)
    f.close()
    return 0


@app.middleware
def log_request(logger: logging.Logger, body: dict, next: Callable):
    logger.debug(body)
    return next()


@app.event({"type": "message", "subtype": None})
def handle_messages(body: dict, say: Say, client: WebClient):
    event = body["event"]
    channelid = event.get("channel", None) or event["channel"]
    ts = readfile('ts.txt').strip()
    btns = readfile('buttons.json')
    if len(ts) > 1:
        try:
            result = client.chat_delete(
                channel=channelid, ts=ts
            )
        except Exception as e:
            print(e)
        response = say(json.loads(btns))


@app.command("/pinned")
def repeat_text(ack, say, command, client: WebClient):
    # Acknowledge command request
    ack()
    ts = readfile('ts.txt')
    if ts.strip() == '0':
        btns = readfile('buttons.json')
        response = say(json.loads(btns))
        pts = response['ts']

        # Update the ts value
        updatets_result = updatets('ts.txt', response['ts'])


if __name__ == "__main__":
    app.start(3000)
Running The App
pip3 install -r requirements.txt
export SLACK_SIGNING_SECRET=***
export SLACK_BOT_TOKEN=xoxb-***
python3 app.py
root@dev:~/pinnedbuttons# python3 app.py
<bunch of debug messages>
INFO:slack_bolt.App:⚡️ Bolt app is running! (development server)
PinnedPost PoCRequired Improvements & Changes
This app (in its current state) is a working PoC for the idea, but it suffers from multiple issues and requires more improvements:
- It's still missing a way for users to set or update their buttons content without coding.
- It requires a database of sorts to store the different enrolled channels and other operational details, storing things like channel ID and timestamp in files isn't a good strategy.
- Performance would suck if we add the bot user to 100s of channels, some threading and performance testing is in order before this app is production-ready.
- Better documentation and more Slash command options would be nice to have.
Next Steps
- I will build persistence into the application and use an SQLite database instead of files.
- I will build it so it listens to an emoji reaction on a post and pin that post.
- I will improve some configuration options and other parts of it.
- I might consider submitting putting the stable version to Github
Outro
I hope you enjoyed this post and that it piqued your interest in this particular customization for Slack. Stay tuned for the other two parts where I make this a much better application and prepare it for public use.
Resources
- https://slack.dev/bolt-python/
- https://github.com/slackapi/bolt-python/
- https://technology.riotgames.com/news/how-riot-games-uses-slack
- https://api.slack.com/block-kit
- https://app.slack.com/block-kit-builder/